
Top Investment Casting: Achieving Superior Precision and Surface Finish
2026-10-01
Ask any engineer what separates a good casting from a great one, and the answer almost always comes down to precision and surface finish. Top investment casting delivers both—but only when the process is pushed to its limits. In this post, we break down what superior precision and surface finish actually mean and how BOYIKUN turns tight tolerances and flawless surfaces into a repeatable standard.
Why the First Dip Sets the Tone for Surface Finish
The first dip is where the liquid either grabs hold of the surface or starts fighting it. Any residual oil, oxide, or uneven roughness that survived cleaning will immediately alter how the coating wets out. If the contact angle varies across the part, you'll see it later as patchy gloss, faint rings, or thin spots that no amount of second or third dipping can fully hide.
Entry speed and angle matter more than most people admit. Plunge a part too fast or at a slight tilt, and you can trap air pockets or create a thick leading edge that sags before it levels. Those early flow patterns set the film's thickness profile, and once the solvent begins to flash off, the coating has a memory—it remembers the path it took during those first few seconds.
There's also a chemical element. In conversion coatings or primers, the first immersion starts the reaction that builds the foundation layer. If that initial deposition is starved or uneven because the bath wasn't agitated or the part was cold, every subsequent layer inherits the same unevenness. A flawless topcoat can't rescue a first dip that left the surface half-primed and half-bare.
Controlling Shrinkage Without Chasing Tolerances
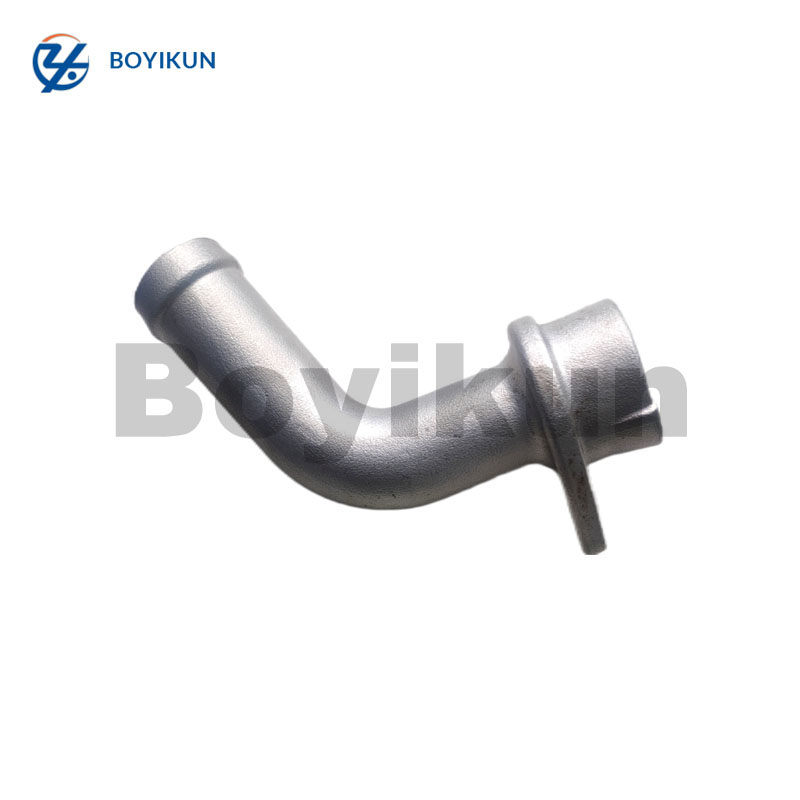
The usual reflex when parts come out undersized is to tighten every dimensional callout on the drawing. But shrinkage rarely responds well to that kind of pressure. Instead of chasing tolerances down to a few microns, it often makes more sense to look at how the material cools, how the mold or tooling breathes, and whether the part geometry itself is fighting the natural contraction. A well-placed rib, a slightly thicker wall section, or a gate location moved by a few millimeters can do more for dimensional stability than any amount of red ink on a spec sheet.
Think of shrinkage as a predictable behavior rather than a defect to be eliminated. Once you measure it accurately across a few cycles, you can bake that allowance into the tooling or the CAD model without obsessing over every tolerance box. Many shops find that a consistent, slightly larger initial geometry—paired with a stable process—beats a tightly toleranced final dimension that only works when the machine operator holds his breath. The goal is to make the part shrink into the size you want, not to demand that the material stop shrinking altogether.
This approach also frees up time on the floor. Instead of constantly adjusting offsets or sorting parts into borderline bins, the team can focus on keeping cooling rates uniform and mold temperatures steady. Those process variables have a far bigger impact on final size than any nominal tolerance tweak. When shrinkage is controlled at its source, the tolerances you do specify become easier to hit—not because they're tighter, but because the process no longer drifts around them.
How Shell Cracking Quietly Ruins Precision
A hairline fracture in a load-bearing shell is rarely noticed until positioning data starts drifting. What looks like a cosmetic flaw actually changes how the structure distributes stress. The crack creates a local compliance that flexes under load, so the same commanded movement no longer produces the same displacement. Over thousands of cycles, that tiny flex becomes a repeatability error that quietly eats away at precision.
Thermal effects make it worse. A cracked shell no longer expands evenly with temperature shifts. The two faces of the crack slide against each other, generating heat and micro-debris. That debris works into mating surfaces, adding unpredictable friction. At the same time, the crack breaks the symmetry of the assembly, letting vibration modes shift into frequency ranges that disturb sensitive measurements. All of this happens below the threshold of obvious failure, so operators see only a slow decline in accuracy.
By the time the crack is visible to the naked eye, the precision loss is already baked into the system. Recalibration might mask the symptom for a while, but the underlying geometry keeps changing. This is why high-precision instruments are often replaced long before a shell crack becomes a structural danger - not because the part will break, but because it has quietly stopped being trustworthy.
The Overlooked Role of Pattern Allowances
Most discussions of casting design jump straight to gating, risers, or solidification modeling. Pattern allowances get treated as a minor correction factor, a set of standard percentages pulled from a table. That assumption quietly undermines the entire process. Shrinkage, draft, and machining allowances are not static numbers—they interact with part geometry, alloy behavior, and even the skill of the molder. When they are treated as an afterthought, dimensional drift starts accumulating before the first mold is made.
Consider shrinkage alone. A foundry might apply a uniform 1.5% factor to a pattern, but real contraction varies with wall thickness, cooling rate, and whether the section is restrained by the mold. Thin ribs shrink differently from heavy bosses. The standard table gives a starting point, not an answer. Experienced patternmakers often adjust the allowance by feel, shaving a millimeter here, adding a taper there. That tacit knowledge rarely appears in textbooks, yet it can be the difference between a casting that fits the blueprint and one that requires expensive rework.
The impact goes beyond dimensional accuracy. Overgenerous machining allowances force machine shops to remove extra metal, which drives up cycle time, tool wear, and energy use. Too little allowance and the part arrives undersized after cleanup. Draft angles that are too steep distort the design intent; too shallow and the pattern will not release cleanly. Foundries that refine these allowances gain an edge that no simulation package can fully replicate, because the final adjustments depend on real shop conditions, not idealized models.
Choosing Alloys That Pour Clean and Measure True
A clean pour rarely comes down to temperature alone. Eutectic and near-eutectic alloys tend to enter thin sections with less turbulence because their freezing range is short, so the metal stays fluid until the mold cavity is nearly full. That keeps oxide films from folding into the stream and reduces cold shuts and laps that have to be ground out later. If you want less time at the fettling bench, pick an alloy that forms a stable, continuous skin rather than one that sheds brittle oxide into the metal.
True measurement is about what the part does after shakeout and during machining. Some alloys shrink unevenly across a long boss or pull a flat face into a slight dish as residual stress lets go. Fine-grained alloys with predictable thermal contraction are easier to trust when holes need to line up without oversized clearances. In a sealing face or bearing bore, that inch-by-inch honesty matters more than an impressive tensile figure on a test report.
Before locking in a material, run a stepped test plate and watch the fill pattern. Note whether the leading edge skins over early, how the risers behave, and whether a ground surface stays flat between casting and final inspection. A good alloy will give the same pour, the same shrink, and the same dimensions batch after batch without constant fiddling with gates and chills.
From Burnout to Pour: Timing Windows That Matter
The line between a bright, clean cup and a bitter, hollow one often comes down to seconds you barely notice when you're running on fumes. Burnout doesn't just drain your energy; it distorts your internal clock. A thirty-second bloom stretches into a minute while you stare at the kettle, or a ninety-second total brew gets yanked at forty because your patience is shot. Those small drifts add up, and the coffee tells the truth every time.
Pay attention to the windows that actually move the needle: the first pour after the bloom, the pause before the final drawdown, and the moment you decide to stop the shot. You don't need a stopwatch glued to your hand. You need to notice when the stream shifts from syrupy to thin, when the bed stops hissing and starts collapsing, when your own shoulders creep up toward your ears. That's the real timing window—the one between noticing and reacting.
So before you pour, reset. Ten seconds of slow breathing at the bar, a quick shake of the wrists, a glance at the grinder's burr temperature. It sounds small, but it pulls you back from the edge of autopilot. The best baristas aren't the ones who follow a recipe to the decimal. They're the ones who can feel when a window is closing and still choose to pour with intent.
FAQ
The ceramic shell builds up around a disposable wax pattern without parting lines, so you skip the mold shift and draft angle issues that plague sand casting. Tolerances of ±0.005 inch per inch are routine, and with careful wax injection and shell drying, ±0.003 inch per inch is achievable on smaller features.
The first and second slurry coats matter most. A fine zircon or fused silica prime coat with controlled viscosity and stucco size leaves a mirror-like cavity. Real-world Ra values land between 60 and 125 microinches; pushing to 32 microinches means switching to a finer prime coat and slowing the dip-and-drain cycle.
Stainless steels and cobalt-chrome alloys reproduce fine lettering and thin ribs extremely well because they wet the ceramic surface during pouring. Aluminum alloys are more prone to oxide inclusions unless you use a vacuum or counter-gravity pour, but titanium and nickel superalloys also respond well with proper shell preheat.
It depends on the feature. Holes down to about 0.040 inch can be cast with soluble cores, and external threads are castable if you allow a small cleanup allowance. True net-shape bores under 0.100 inch usually need reaming or honing because as-cast surface variation across a batch can exceed a tight H7 tolerance.
Use chills or insulating sleeves on the wax pattern, and design gates so the thickest section solidifies last. Also, switch to a hotter mold and slower pour to feed the solidification front. If porosity still appears, consider a small riser hidden in a non-functional area rather than increasing wall thickness.
Wax shrinkage is predictable but not uniform. You need to compensate differently for long thin walls versus bulky bosses. A well-controlled injection temperature and holding pressure keep the wax dimensionally stable, and using a filled wax instead of unfilled reduces warpage during shell building.
Higher permeability lets gases escape during pouring, preventing back-pressure defects that roughen the surface. But too much permeability can mean a weaker shell that flexes under molten metal pressure. Adding a few extra backup coats with coarser stucco improves venting without sacrificing rigidity, keeping both dimensions and finish stable.
Yes, printed wax or resin patterns can go straight into the ceramic shell process, but you need to adjust burnout cycles. Residue from photopolymer patterns can crack the shell if burnout is too fast, so a slow ramp to 600°C before high-temperature firing gives clean cavities and the same surface finish as traditional wax.
Conclusion
Precision investment casting begins long before metal enters the mold, and the first ceramic dip largely decides whether a surface comes out silky or rough. A thin, bubble-free prime coat replicates the wax pattern at a microscopic level and prevents stucco from imprinting through later layers. If that initial shell is compromised, cracks can form during drying or burn-out, and the damage rarely announces itself until the casting shows flash or dimensional drift. The quiet failure of shell cracking is one of the most common reasons parts miss tolerance, yet it often gets blamed on poor wax or alloy. Equally important is the window between burn-out and pouring; leaving a hot shell too long invites oxidation and moisture pickup, both of which bite into surface finish and metallurgical cleanliness.
On the dimensional side, shrinkage needs to be managed through intentional gating and controlled cooling, not by forcing every feature into a single tolerance band. Pattern allowances are frequently treated as an afterthought, but they are the difference between a casting that fits and one that gets hand-worked into scrap. Alloy selection also plays an underrated role: some grades pour with a clean, continuous skin and hold their dimensions after solidification, while others show hot tears or oxide lines no amount of finishing can fully erase. By aligning the first dip, shell integrity, burn-out timing, shrinkage strategy, pattern allowances, and alloy behavior, investment casters can consistently deliver precision parts with surfaces that require little to no secondary cleanup.
Contact Us
Contact Person: Xianchen Hu
Email: [email protected]
Tel/WhatsApp: 86-13248645200
Website: https://www.hexnb.com/